
操作步骤:
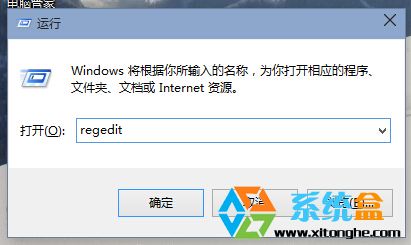
1、首先点击注册表编辑器,在运行中写入 regedit回车便可;
2、点击注册表后,展开“HKEY_CLASSES_ROOT\Folder\Shell”路径,右键打开Shell,选中“新建-项”,项:“windowsDefender” 。
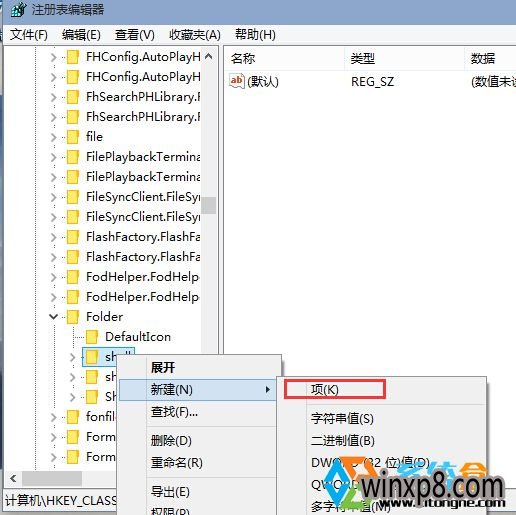
新建项
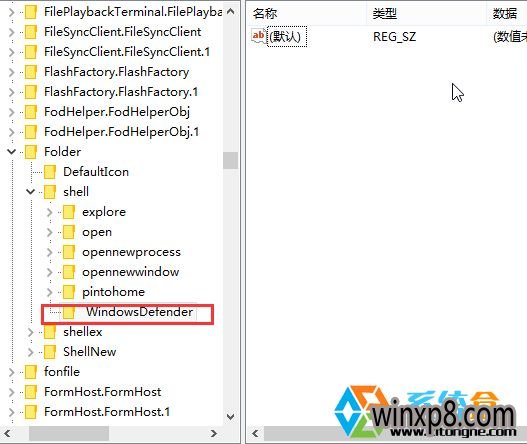
命名为windows defender
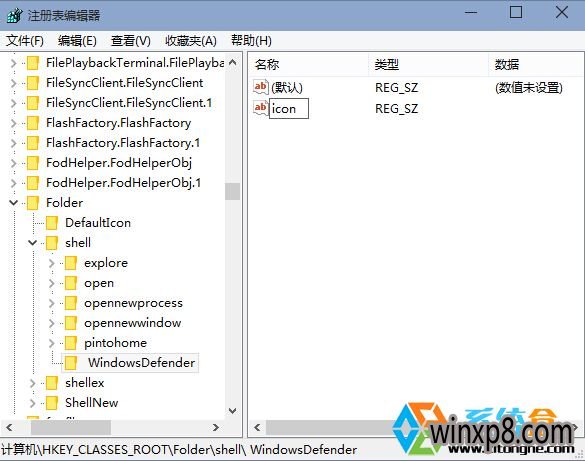
3、选择windows Defender后,在右侧,选中“新建-字符串值”,新字符串值名为“Icon”。
4、然后双击 ICON ,并在编辑数据中写入“%ProgramFiles%\windows Defender\EppManifest.dll”,然后确定 (www.xp002.com);

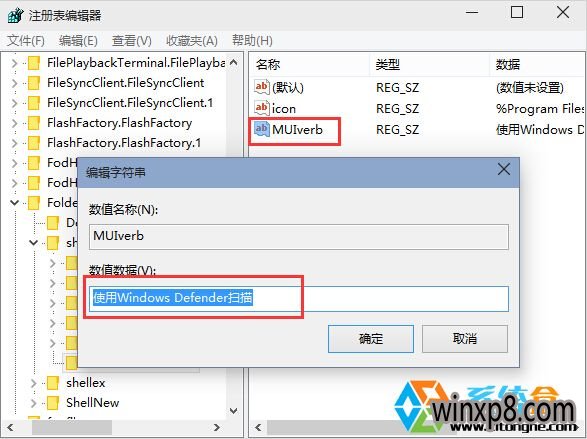
5、然后大家再新建一个“字符串值”,命名为“MUIVerb”将数据填写为“使用windows Defender扫描”,确定;
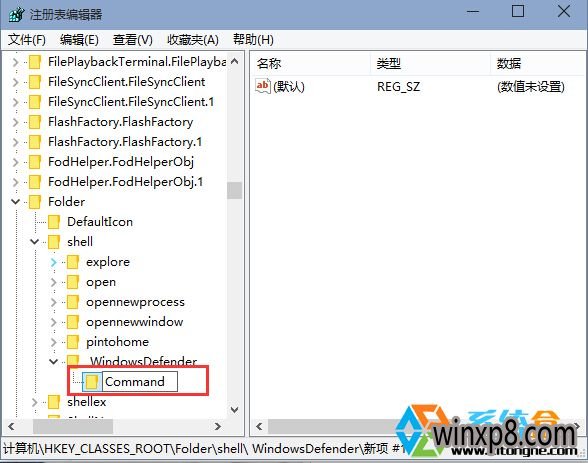
6、然后右键打开刚才新建的 windows Defender 项,右键“新建-项”,命名为“Command”。
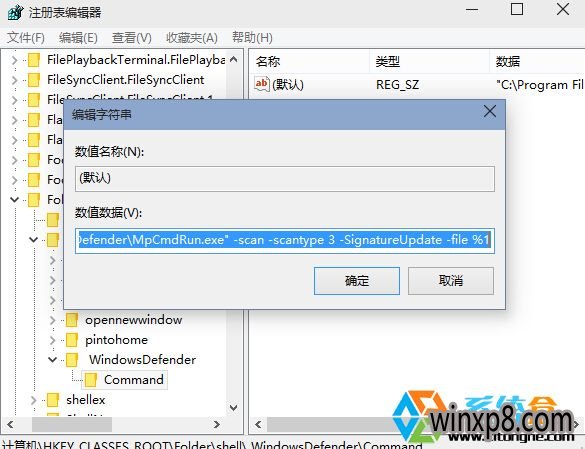
7、选中Command后,大家双击右侧的默认“字符串值”,然后将数据改成C:\Program Files\windows Defender\MpCmdRun.exe" -scan -scantype 3 -SignatureUpdate -file %1 确定;
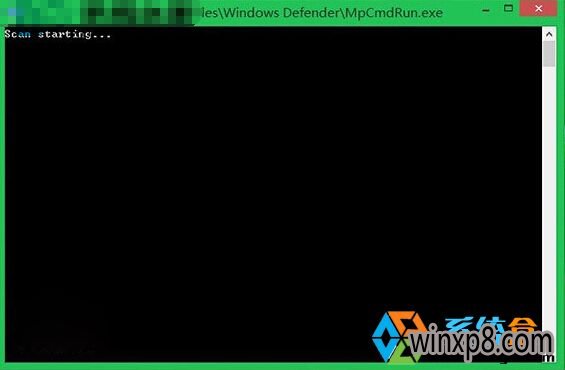
8、最后关闭注册表,然后大家右键打开文件夹看看,是否是多了一个“使用windows Deffender扫描”呢,不过现在还不能支持单个文件哦,只能文件夹有效,下面来看看打开后的效果;
好了windows10系统在右键菜单添加使用windows Defender扫描选项的办法就详解到这里,希望对我们有借助。
分享到: